Playing games on your PC is comfortable. However, you can make it even more comfortable by connecting an Xbox 360 controller. Instead of using a mouse and keyboard to control the gameplay, you can use an Xbox 360 controller that feels less clunky and doesn’t require you to remember a plethora of commands.
With a controller, you can game smoothly and have a more relaxed experience. However, connecting your Xbox 360 controller to a PC is not as simple as you may think, especially if you don’t have a wireless receiver.
It is worth mentioning that you cannot connect an Xbox 360 controller directly to your PC. You need a receiver, so your computer can recognize the controller and complete the pairing process. However, if you don’t have a receiver, it is going to be a lot trickier to get your controller to work with your PC.
Ways To Connect Xbox 360 Controller To PC
While you cannot connect an Xbox 360 controller directly to your PC, there are a few ways to go around it. You can connect your controller through wires, purchase an Xbox package, or use an adapter.
Method 1 – Connecting Through Wires
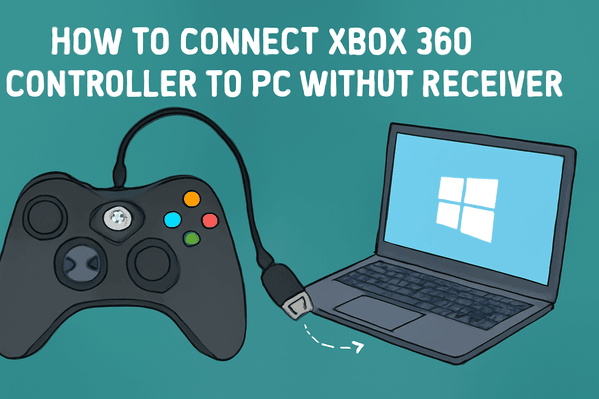
This is possibly the easiest way to connect your Xbox 360 controller to your PC. All you need is a USB cable to establish the wired connection.
Here’s how:
- Take the USB cable and connect it to your PC.
- Plug the other end of the cable into the USB port of your Xbox 360 controller.
- As soon as you connect the two devices, you will see the Xbox drivers installed on your PC.
- After the drivers are installed, switch on the controller by pressing the Xbox button.
- Now you are ready to game on your PC using your Xbox 360 controller.
Method 2 – Using A Wireless Networking Adapter
Since you don’t have a receiver, you can use a wireless networking adapter to complete the connection. All you have to do is follow these instructions and you are good to go.
- Connect the Xbox 360 adapter with your PC.
- Wait for your PC to download and install the necessary drivers.
- Once that is done, hit the Button on your adapter.
- Long-press the Guide button on your controller until it turns on.
- Now, connect your controller to the wireless adapter by pressing the Connect button. That’s all you need to do to get your Xbox 360 controller to work with your PC.
Method 3 – Purchase Xbox Package
If you don’t find the other two solutions convenient, you can purchase a Microsoft Xbox package. However, setting up this option can be a bit tricky and requires too many accessories. Also, it costs more than other methods. It is better to opt for this method only if you don’t have an Xbox.
The Microsoft Xbox bundle for Windows comes with everything you need and works well with different versions of Windows. Unlike older controllers, this one connects easily and wirelessly to your PC without causing issues. So, if you are looking for a smooth and simple setup, purchasing this bundle is a smart choice.
Connecting Xbox 360 Wireless Receiver To Your PC
The steps to install an Xbox 360 wireless receiver on your computer depend on the version of Windows you are using. But don’t worry as the setup is simple and hassle-free. Below, you will find a step-by-step guide for each Windows version.
For Windows 8 And Windows 10 Users:
Connecting your Xbox 360 wireless receiver on Windows 8 or 10 is quite easy if you follow these steps correctly.
- Plug the Xbox wireless receiver into a USB port on your PC.
- Your computer should automatically recognize the device and install the required drivers.
- Once the installation is done, your receiver is ready to use.
To check if the installation worked:
- Open the Start Menu.
- Search for Device Manager.
- Look for a device named “Xbox 360 Wireless Receiver for Windows.”
- If you see this, it means everything is set up correctly.
For Windows 7 or Earlier Versions:
Setting up the receiver on Windows 7 and older systems takes a few more steps since it doesn’t install drivers automatically.
Here’s what you need to do:
- First, connect the receiver to your PC via a USB port.
- A setup wizard will appear on your screen, prompting you to install the software.
- If your system already has the required files, choose Automatic Installation and let it run.
If it doesn’t have the drivers, you have two options:
Option 1: Insert the CD that came with your receiver into your computer and follow the installation instructions.
Option 2: Go to Microsoft’s official website, search for Xbox 360 receiver drivers, and install them.
To confirm everything is working:
- Open Device Manager on your computer.
- Check if the Xbox 360 receiver is listed.
- If it is, you will see an option like “Pair Controller to PC.” Click on that option and your controller will connect.
Setting Up A Third-Party Xbox 360 Wireless Receiver On Your PC
To set up a third-party Xbox 360 wireless receiver on your PC, you must follow these steps.
Step 1: Install The Required Drivers
To start, you will need to install the drivers that allow your PC to recognise the third-party receiver.
- Plug the receiver into a USB port on your PC.
- Go to the Start Menu and type Device Manager in the search box.
- In Device Manager, find and click on “Other Devices.”
- Look for “Unknown Device,” and right-click on it.
- Choose “Update Driver Software.”
- Select “Browse” my computer for driver software.
- Click on “Let me pick from a list of device drivers on my computer.”
- From the list, choose “Xbox 360 Peripherals.”
- Another list will appear where you need to pick the latest version available and click Next to start the installation.
- Confirm any prompts by clicking “Yes” to continue.
Step 2: Pair Your Xbox Controller With Your PC
Now that the drivers are installed, it’s time to connect your controller.
- Press the “Pair” button on the wireless receiver.
- Then press the guide button on your controller.
- If the ring around the button turns green, your controller has successfully connected.
Step 3: Check The Connection
To confirm the controller is ready:
- Look for “game controller” on your computer.
- Search for “Set up USB game controller.”
- Click to open it and check if your Xbox controller appears in the list.
- Test it by moving the thumbsticks and pressing the buttons.
- If everything responds correctly, your controller is set up and ready for gaming.
Final Words
Connecting an Xbox 360 controller to your PC without a receiver may seem challenging, but with the right methods, it is possible. You can choose any of the alternative methods as explained in this post and enjoy a smooth gaming experience using your favourite controller.

